
Learn all about light rails
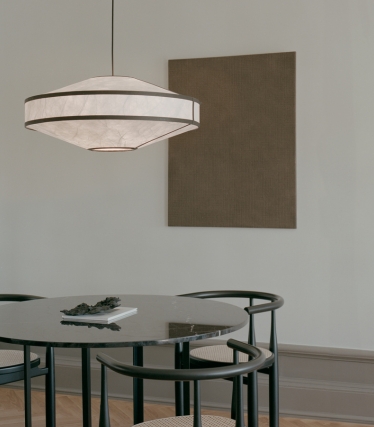
THE ULTIMATE GUIDE TO TRACK LIGHTINGIf you're looking for a flexible and practical lighting solution for your pendants and spotlights, you've come to the right place. Because at Lampemesteren we have a great selection of track lights and spare parts from brands such as ANTIDARK and Halo Design, so you're guaranteed to find the track that suits your needs. A track light is an easy, practical and flexible tool to use above your dining table, over your wardrobe, in the living room, in the hallway - well, the sky's the limit really. With a track light, you also get rid of a lot of wires hanging everywhere - a track light makes wires superfluous. With a track light, you can also decide where your pendants or spots are placed and angled, and you can continuously change their direction and position according to your needs - putting your own unique stamp on the lighting. But what should you do once you've chosen the right track? How should you actually approach the installation? You'll find answers to these questions in this article, after which you'll be quite the handy(wo)man yourself!
LEARN MORE ABOUT 1-PHASE OR 3-PHASE TRACK LIGHTING
It can be difficult to know whether to use a 1-phase or 3-phase track. First and foremost, you need to consider where you will be using your rail. If the track is to be used in your business, a 3-phase track can be advantageous as it has more watts and switches, so you can also turn on, off or dim the individual brightness of the respective lamps independently of each other. If, on the other hand, you need to use your track at home, you can use a single-phase track, which usually has a nicer design and only has a single live wire, so you can only adjust the light intensity of the lamps simultaneously. Whether you choose a 1-phase or 3-phase track, you are guaranteed versatile and flexible lighting.
**Please note that all Bankamps, ANTIDARKs and Halotracks lightbars are 1-phase only, so if you want a 3-phase, please contact customer service.
:format(jpeg) "light rails - spotlights")
)
ANTIDARK's DESIGNLINE SYSTEM
Below you will learn more about ANTIDARK's Designline rail system, which is of high quality, has many different combinations and a thinner design than the usual rails with a width of only 2.2 cm. With these rails, you can move the lamps around as needed and use the rail in a variety of places, from the office to the gallery or above the dining table at home. ANTIDARK's Designline track is available in black or white with a length of 1 or 1.9 meters respectively, which can be used alone or in combination with multiple tracks to create greater flexibility in the placement of your lights. All Designline spare parts also come in black or white, so the colors of the different parts match.
HOW TO INSTALL YOUR DESIGNLINE RAIL SYSTEM
STEP 1 First, you start by mounting your Designline track on the ceiling where you want the flexible lighting and plug it into the nearest lamp socket. First of all, make sure you also have a Starting piece, which every Designline rail system requires for setup. Please note that the starter should be placed at the end of the lightbar and not in the middle as with a Center start.
:format(jpeg) "light rails - starter + center starter")
)
STEP 2 Next, you can choose to combine multiple rails together, where you can use a number of different connections. For example, you can use a Connector so you can connect several light bars in extension of each other; or a T-Connector so you can connect three bars at the same time to form a "T"; or a Corner, which you can use if you want your light bars to form a corner. No matter which Connector you choose, you will be able to spread the light over a larger area in different directions.
STEP 3 After the first two steps, you can start adding exactly the number of Design Tube Spots, Designline Bell Spots or Designline Tube Pendants to your track to suit your needs. Here you can combine both spotlights and pendants as you see fit, and easily and elegantly change their positions according to your needs and mood to create a unique and decorative design element that can be placed anywhere in your interior design.
:format(jpeg) "light rails - designline rail system")
)
STEP 4 If you want to add "regular" shuttles to your rail system that are not tailor-made for it, you need to use a Shuttle adapter. Then you're ready to hang your pendants at exactly the distance and in the number you want on your rail - please note that each pendant can weigh a maximum of 5 kg. With a track light, you can have multiple lights next to each other without the need for additional wiring - quite smart and practical.
STEP 5 As a nice finishing touch to your track system, you can add a plastic Deck rail over your Designline track to cover the holes where the lamps are not placed for a more streamlined look. The deck rail can also be easily cut and customized to suit your needs.
:format(jpeg) "light rails - designline deck rail")
HALO TRACK LIGHT RAILS
Below you can learn more about the Halo Track track system, which is a simple and smart system that also gives you a wealth of flexible lighting options. Available in both black and white, Halo Tracks are available in either 1.2 or 2 meter lengths, which you can use alone or with multiple tracks to expand the size of the area you want to illuminate.
:format(jpeg) "halo track light rails")
HOW TO INSTALL YOUR HALO TRACK SYSTEM
STEP 1 First, mount your Halo Track track on the ceiling and install it in the nearest power outlet. The track can be shortened, lengthened and mounted simply with the included screws. All 230V pendants can be used for Halo Track track lighting, where dimmers can also be used.
STEP 2 Next, you can choose to connect multiple tracks together, either by using a T-piece, which allows you to connect three tracks at once so that they form a T; or by using a Connection system for Halo Track tracks. This assembly system includes a Halo Track 90° angle that you can use to connect your conductor rails together to form a corner. It also includes an El collector, which you can use if you want to connect several light bars in a straight line to extend the lighting over a larger area - for example over a long dining table or aisle. Last but not least, there is also a Flex connector for the Halo Track rail that allows you to join two rails and bend the joint exactly how you want. With this assembly system, you get a wide range of mounting options so you can perfectly match your lighting to your décor and needs.
STEP 3 As a final part of the installation, you can connect your spotlights or pendant lights to the rail - and if you use ordinary pendant lights, you will also need a Pendant adapter, which is compatible with all 230V pendants weighing max 4 kg - the adapter can also be used for most other lamps.